
 Save Pin
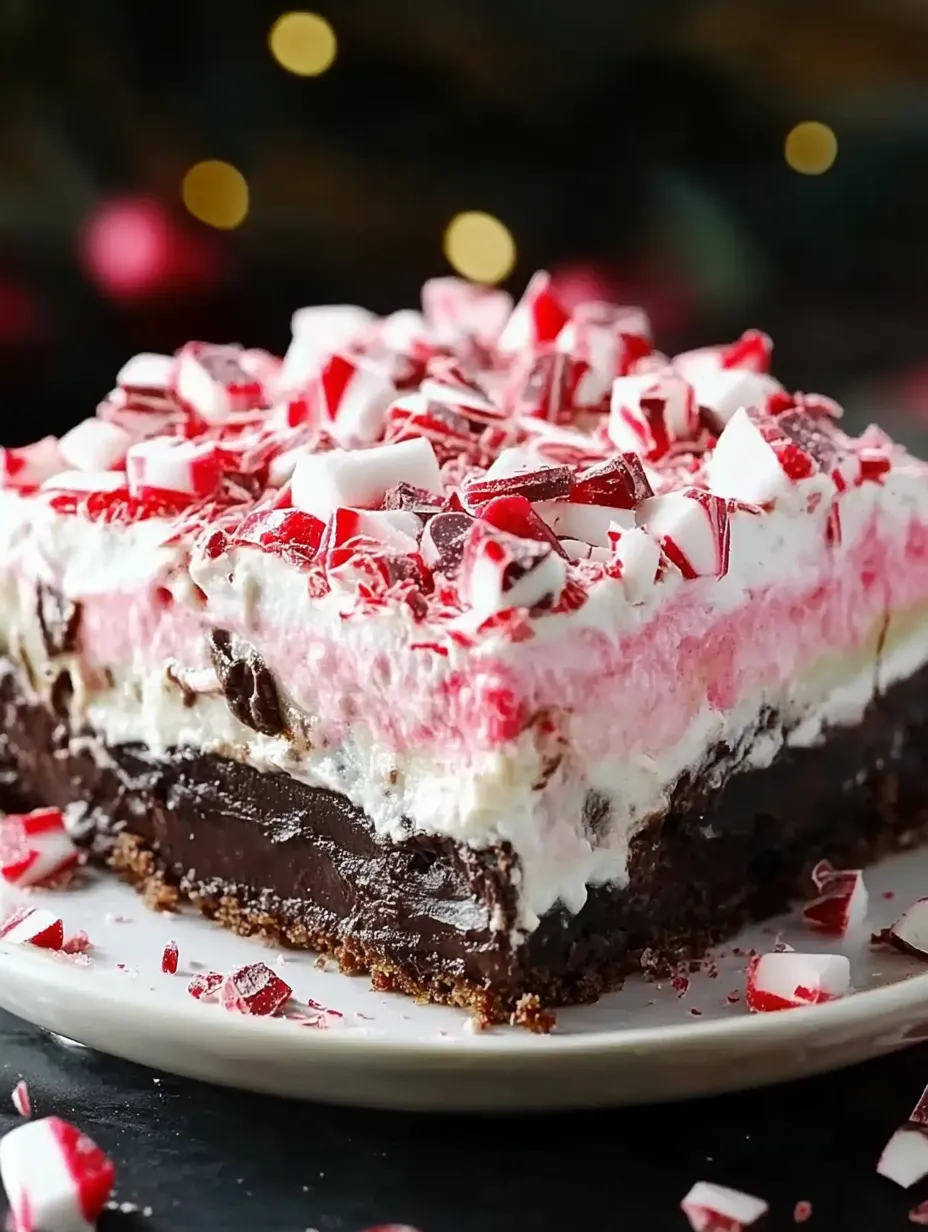
My chocolate peppermint dessert stack has turned into the star attraction at Christmas parties, always getting tons of compliments. The combo of smooth peppermint, rich chocolate, and light whipped layers makes a holiday treat that brings Christmas flavors in every mouthful.
I whipped this up for a local Christmas get-together about three years back, and it vanished quicker than anything else served. These days my family won't let me show up to any holiday event from Turkey Day to January 1st without it.
Ingredients
- Oreo cookies: Form the dark chocolatey base don't grab double stuffed ones as they'll mess up the texture
- Unsalted butter: Holds the crust together and adds a rich taste always go unsalted so you can manage the saltiness
- Cream cheese: Gives that lovely tang pick the block type not the fluffy stuff for proper consistency
- Peppermint extract: Brings that classic holiday kick grab pure extract for the strongest flavor
- Candy canes: Add holiday sparkle and nice crunch try to find traditional red and white ones
- Instant chocolate pudding: Makes the velvety middle section pick something decent
- Whipped topping: Speeds up the whole process feel free to make your own if you've got time
Step-by-Step Instructions
- Fix the Oreo Base:
- Crush whole Oreos including filling until they're fine crumbs then stir in melted butter until everything looks wet. Push this mix firmly into a 9x13 inch pan a measuring cup bottom works great for this. Stick it in the fridge or freezer while you work on the next part.
- Whip Up the Peppermint Layer:
- Mix soft butter and cream cheese until they're smooth about 2 minutes with a mixer on medium. Add your powdered sugar and extracts beating until it's light and fluffy. Carefully fold in whipped topping don't be rough or you'll lose all the air. Mix in some crushed candy canes the mix will turn slightly pink on its own.
- Build Your First Layers:
- Spread your peppermint cream mix over the cold Oreo base a flat spatula helps get it even. Pop it back in the freezer for 10-15 minutes this quick chill makes the next step much easier.
- Create the Chocolate Middle:
- Beat both pudding mix packets with cold milk until it starts getting thick about 2 minutes of good whisking. Pour this over your slightly firm peppermint layer work fast before the pudding sets too much.
- Top It Off:
- Let the pudding firm up in the fridge for half an hour then gently spread whipped topping across everything evenly. Refrigerate at least 5 hours but leaving it overnight works even better so flavors can blend.
- Last Touches and Serving:
- Right before you serve it sprinkle the last of your crushed candy canes on top if you add them too soon the moisture will make them melt away.
 Save Pin
The bits of candy cane give a nice crunch against all those smooth layers while spreading mint flavor throughout. I really love how the peppermint cream layer turns slightly pink as the candy canes melt into it it looks so festive without needing any food coloring.
Make It Your Own
You can easily tweak this dessert to match what you like. Want stronger mint flavor? Bump the peppermint extract up to 1½ teaspoons. Prefer just a hint of mint? Cut back to ½ teaspoon. What's great about this treat is how you can change it while keeping that holiday taste everyone loves.
Storage Tips
This dessert stays good in the fridge for up to 4 days, so you can make it ahead when the holidays get crazy busy. Wrap it tight with plastic so it won't pick up weird fridge smells. For the best look, wait to sprinkle those crushed candy canes until you're ready to serve.
Serving Suggestions
Put this festive treat on your holiday sweets table next to hot cocoa or coffee. Want to make it extra fancy? Add a tiny candy cane or chocolate mint on each slice. The cold dessert paired with a warm drink makes the perfect winter combo.
The History Behind The Layers
Stacked desserts got big in American homes back in the 70s when instant pudding and pre-made cookie crusts became easy to find. This updated version mixes those nostalgic layers with classic holiday peppermint flavor. We call it "lasagna" because like the Italian pasta dish, it's all about those distinct stacked layers.
 Save Pin
Common Recipe Questions
- → How do I make the Oreo crust?
Smash 36 Oreos with filling in your food processor, mix with melted butter, then push it down firmly in a 9x13-inch pan. Stick it in your fridge or freezer to harden up.
- → Can I use fresh whipped cream instead of Cool Whip?
You can definitely swap in homemade whipped cream, but just know your dessert might feel a bit different than with store-bought topping.
- → How do I crush candy canes for the layers?
Take your candy canes out of wrappers, put them in a plastic bag, and whack them with a rolling pin until you get small chunks.
- → Can this be prepared ahead of time?
You can totally make this a day early and keep it cold in your fridge. Just wait to add the candy bits until you're ready to serve so they don't get soggy.
- → How long does the dessert need to chill?
Let it hang out in the fridge for at least 5 hours or even overnight so everything firms up nicely before you dig in.