
 Save Pin
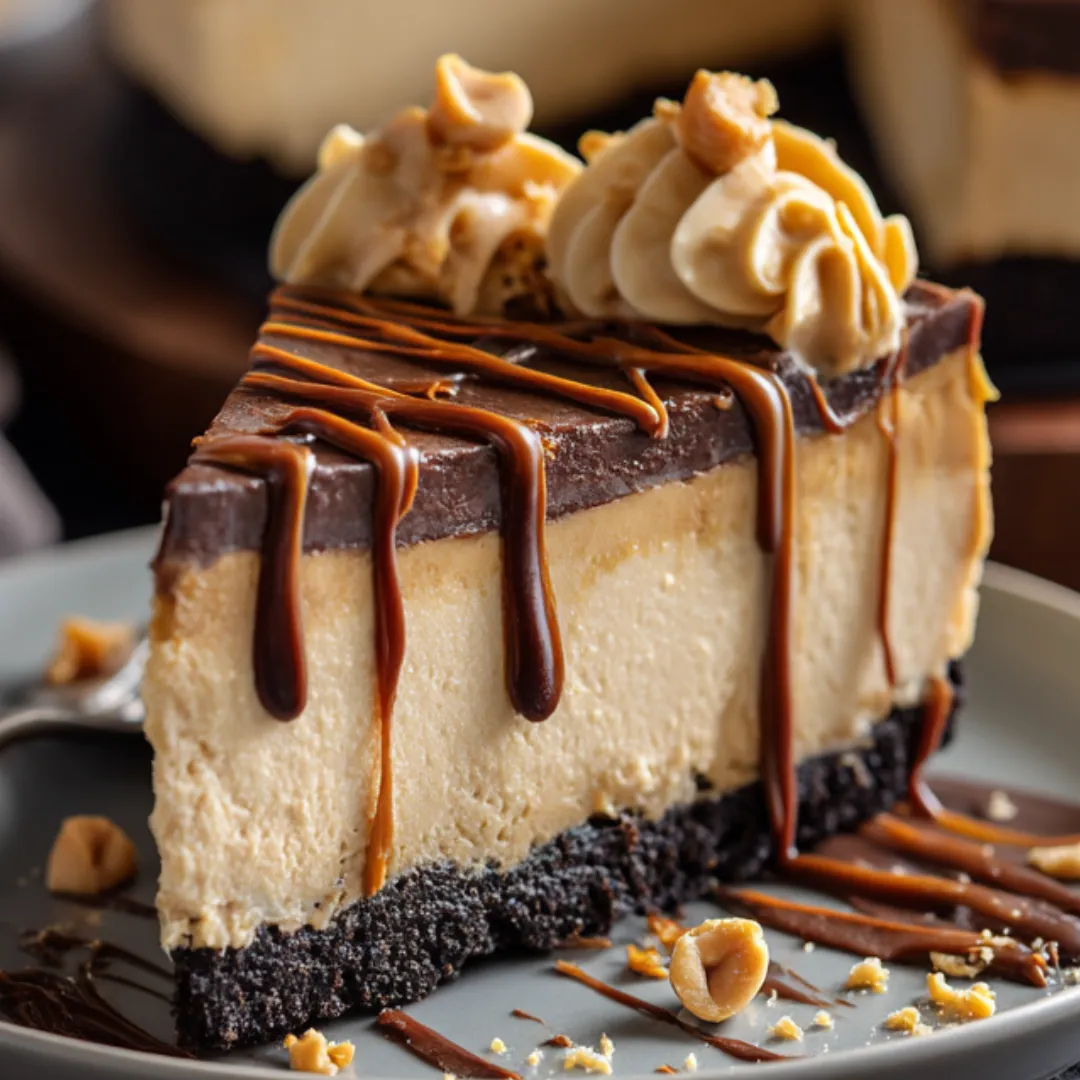
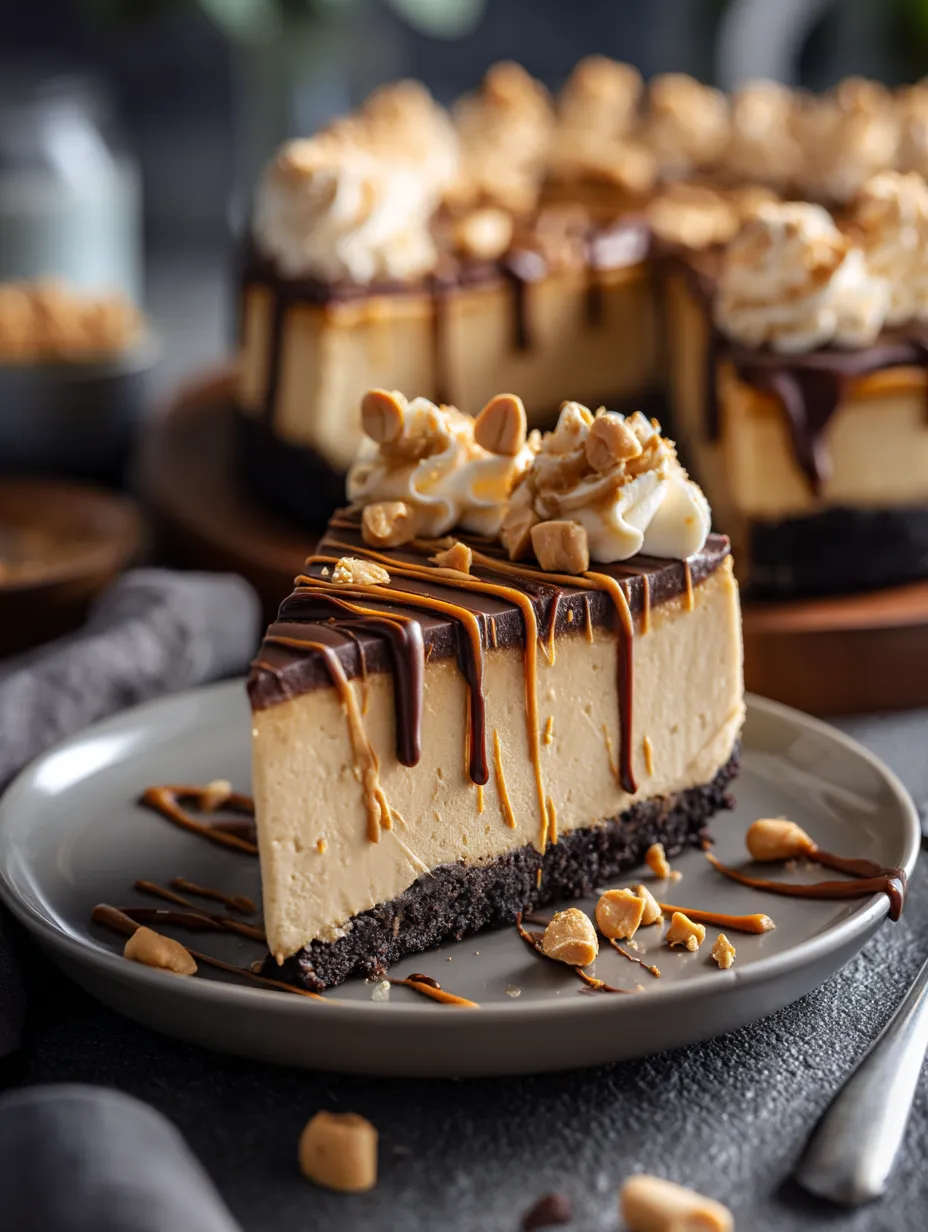
Velvety peanut butter filling resting on a chocolate cookie base makes a treat that hits those deep cravings without turning on the oven. This no-bake creation perfectly balances smooth and crunchy, decadent and airy, sweetness and subtle saltiness. The real beauty happens during assembly – cream cheese adds tanginess and foundation, peanut butter delivers its signature nutty flavor, and whipped cream transforms everything to dreamy lightness. And the best part? This stunning dessert just needs mixing, folding, and waiting while it sets up in the fridge.
I brought this to my sister's birthday party last month, and it completely outshined the fancy layer cake I'd also made. My twelve-year-old nephew, who calls himself a "cheesecake connoisseur," said it was the tastiest dessert he'd ever had and begged to take the last piece home. Even my mother-in-law, who usually skips sweet stuff, went back for seconds and quietly asked me for the recipe before heading out.
Key Ingredients
- Cream cheese: The backbone of any proper cheesecake; go for full-fat, block-style cream cheese for the creamiest result and let it warm up completely at room temperature to avoid lumps. You'll need 16 ounces (2 blocks).
- Creamy peanut butter: Stick with regular creamy peanut butter instead of natural kinds that might separate; brands such as Jif or Skippy give you reliable texture and sweetness that works great here. You'll need 1 cup.
- Chocolate sandwich cookies: They form a rich chocolatey foundation that works beautifully against the filling; keep the cream filling inside—it actually helps hold the crust together. You'll need 24 cookies (around 14 ounces).
- Heavy whipping cream: It turns the thick peanut butter-cream cheese mix into something incredibly airy; make sure it's very cold for the best volume. You'll need 1 cup.
- Powdered sugar: The fine powder blends perfectly into the filling, adding sweetness without any graininess that regular sugar might create. You'll need ½ cup.
 Save Pin
Detailed Cooking Method
- Step 1:
- Get your pan ready – Put parchment paper on the bottom of a 9-inch springform pan to keep the crust from sticking. For extra protection against leaks, wrap aluminum foil around the outside, especially if your pan doesn't close tightly. This prep work makes sure your cheesecake will come out nicely when it's time to serve.
- Step 2:
- Make a tasty chocolate base – Put 24 chocolate sandwich cookies in a food processor and pulse until you get fine crumbs with no big chunks left. If you don't have a processor, stick the cookies in a sturdy zip-top bag and smash them with a rolling pin. Dump the crumbs in a bowl and pour in ¼ cup of melted unsalted butter. Mix with a fork until it looks like wet sand – it should stick when pressed but still be a bit crumbly.
- Step 3:
- Shape and cool the base – Empty the cookie mix into your prepared pan. Using a measuring cup bottom or flat glass, press the crumbs firmly across the bottom and about 1 inch up the sides. Push down hard to make a solid crust that won't fall apart when cut. Stick the pan in the fridge for at least 30 minutes while making the filling – this cooling step is key for a good foundation.
- Step 4:
- Start the peanut butter mixture – In a big mixing bowl, beat 16 ounces of softened cream cheese with an electric mixer on medium until totally smooth, about 2-3 minutes. Scrape the bowl sides several times during mixing to get rid of all lumps – this careful step prevents texture issues later. Add 1 cup of creamy peanut butter and keep beating until it's completely mixed with the cream cheese.
- Step 5:
- Sweeten and flavor it – Sift ½ cup of powdered sugar into the peanut butter mix to avoid lumps. Add 1 teaspoon of vanilla extract, which boosts the peanut butter taste without fighting it. Beat again until the mixture looks silky and even in color, stopping to scrape the bowl sides and bottom to mix in any missed spots.
- Step 6:
- Add airiness with cream – In another cold bowl, whip 1 cup of cold heavy cream until it forms tall peaks. The cream should stand up when you lift the beaters but still look shiny and smooth, not grainy or clumpy. This whipped cream will lighten the heavy peanut butter mix into a fluffy, mousse-like filling.
- Step 7:
- Get the folding right – Add a third of the whipped cream to the peanut butter mixture and gently fold it in with a rubber spatula. Cut through the middle, scrape along the bowl bottom, and fold the mix over itself. Turn the bowl slightly and repeat until mixed. Add the rest of the whipped cream in two batches, folding just until no white streaks remain. This gentle handling keeps the air bubbles that make the filling light.
- Step 8:
- Put it together and chill – Take the cold crust from the fridge and pour the peanut butter filling onto it. Use a spatula to smooth the top into an even layer, making sure to reach the edges while keeping it level. Cover with plastic wrap, making sure it doesn't touch the filling. Refrigerate for at least 6 hours, preferably overnight, until the cheesecake is fully set and firm when touched.
I found out how important careful folding is after ruining what should've been an amazing cheesecake for my husband's birthday a few years back. Trying to finish before he got home, I rushed the folding step and ended up with a dense, heavy cake that tasted good but missed that airy texture that makes this dessert so special. My grandma taught me to fold "like you're handling clouds," and I've never forgotten that image. Now my daughter helps make this cheesecake for family get-togethers, and watching her carefully fold the mixture with such focus is one of my favorite kitchen memories.
Amazing Topping Ideas
Though this cheesecake tastes fantastic plain, well-chosen toppings can make it truly spectacular. A simple approach is to warm about ¼ cup of peanut butter until it's runny, then drizzle it in a zigzag across the top. Follow up with ¼ cup warm chocolate fudge sauce going the other way, creating a pretty crisscross pattern.
For some crunch, scatter ¼ cup chopped roasted peanuts around the cheesecake edge. Their slight saltiness and crunch work wonderfully against the smooth, creamy filling. Mini chocolate chips or chocolate curls (about ¼ cup) add more texture and boost the chocolate flavor.
Planning and Serving Suggestions
This cheesecake is perfect for hosting because it actually gets better over time. Make it up to three days ahead and keep it covered in the fridge. The flavors blend together, and the texture becomes even smoother.
For picture-perfect slices, dip a big, sharp knife in hot water and wipe it dry between cuts. This stops the filling from sticking to the knife and gives you restaurant-quality presentation. Let the cheesecake sit out for 10-15 minutes before serving so it's not too cold and the flavors can fully develop.
 Save Pin
Ways to Make It Your Own
This recipe shines in how easily you can change it up. For chocolate lovers, mix in ½ cup of mini chocolate chips to the filling before pouring it into the crust. They'll spread throughout, giving little chocolate surprises in every bite.
For deeper flavor, swap out the vanilla extract with 1-2 tablespoons of bourbon or rum. The alcohol cooks off, leaving just warm, caramel notes that go great with peanut butter.
If you want it sweeter, bump up the powdered sugar to ¾ cup. Or for a more grown-up taste, cut it down to ⅓ cup to let the natural peanut flavor stand out more.
I've whipped up this no-bake peanut butter cheesecake countless times, and it always gets those happy sighs from around the table. There's something special about how chocolate and peanut butter work together – a mix that feels both fancy and comforting at the same time. What I really love is how it can turn an ordinary family dinner into something special or add that perfect finishing touch to a holiday meal. Though it's super simple to make, there's something undeniably impressive about serving a beautifully set cheesecake, especially when you mention that you never even turned on the oven. It's my go-to dessert – fancy enough for guests but easy enough for a random Wednesday when you just need something amazingly tasty in your day.
Common Recipe Questions
- → Can I prepare this cheesecake in advance?
- For sure! This dessert works great when made ahead. You can keep it in your fridge for up to 3 days or stick it in the freezer for up to a month. When frozen, let it thaw in the fridge overnight before serving.
- → Can I swap in crunchy peanut butter instead of smooth?
- You can, but it'll change how it feels in your mouth. The crunchy kind adds little peanut chunks throughout. Just pick a good quality peanut butter that's not too oily for best results.
- → What can I do if I don't own a springform pan?
- A deep pie dish works fine too. Put parchment paper in with extra hanging over the edges to help you lift it out later, or just serve it straight from the dish without taking it out.
- → My cheesecake isn't firming up properly. What went wrong?
- You need to beat the heavy cream until it forms stiff peaks and fold it in carefully. Also, the cheesecake needs at least 6 hours to get firm - leaving it overnight works even better. Using full-fat cream cheese also helps it set right.
- → Is there a way to make this without dairy products?
- You can definitely use non-dairy cream cheese and whipped coconut cream (chilled first) instead of heavy cream. It might feel a bit different in your mouth, but will still taste amazing.