
 Save Pin
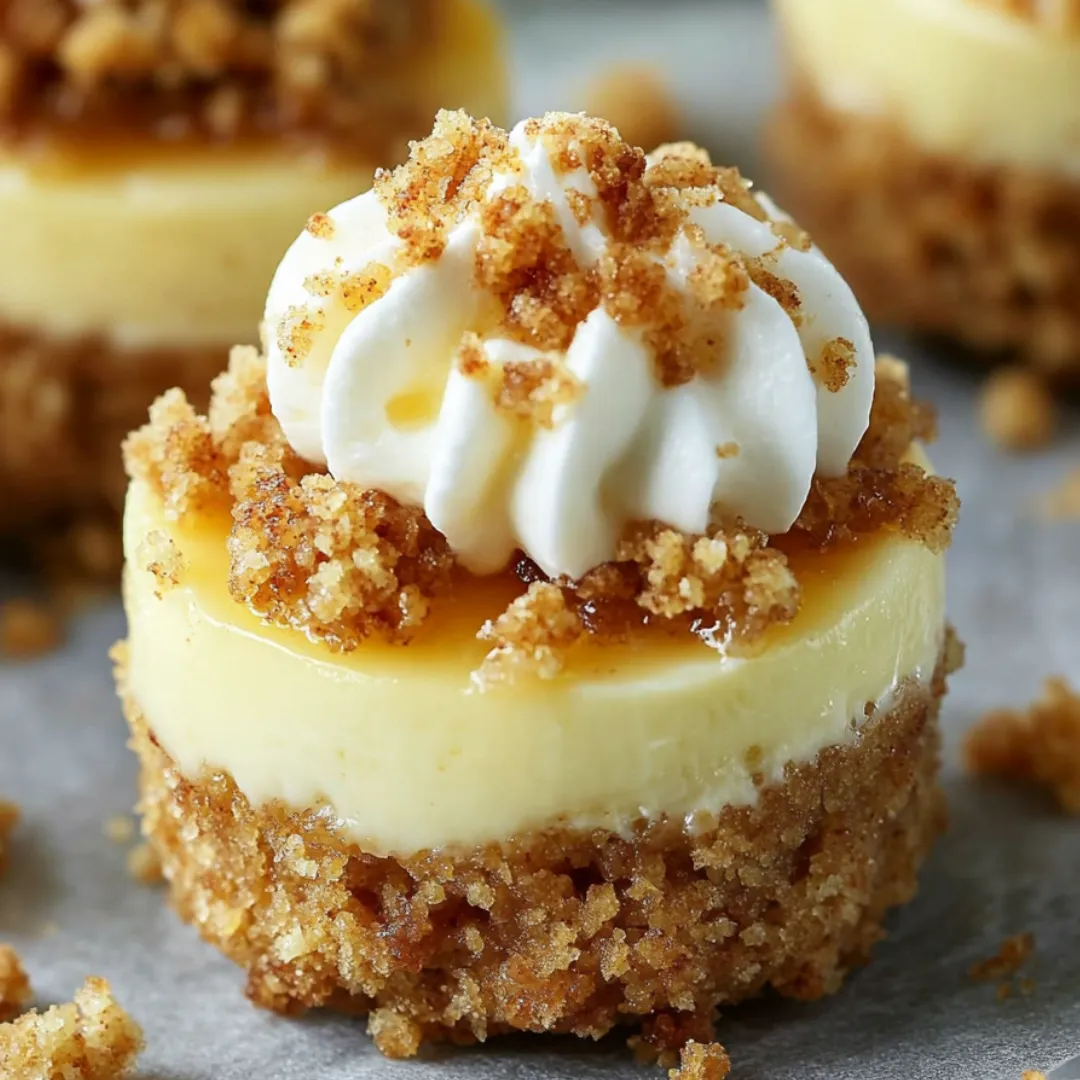
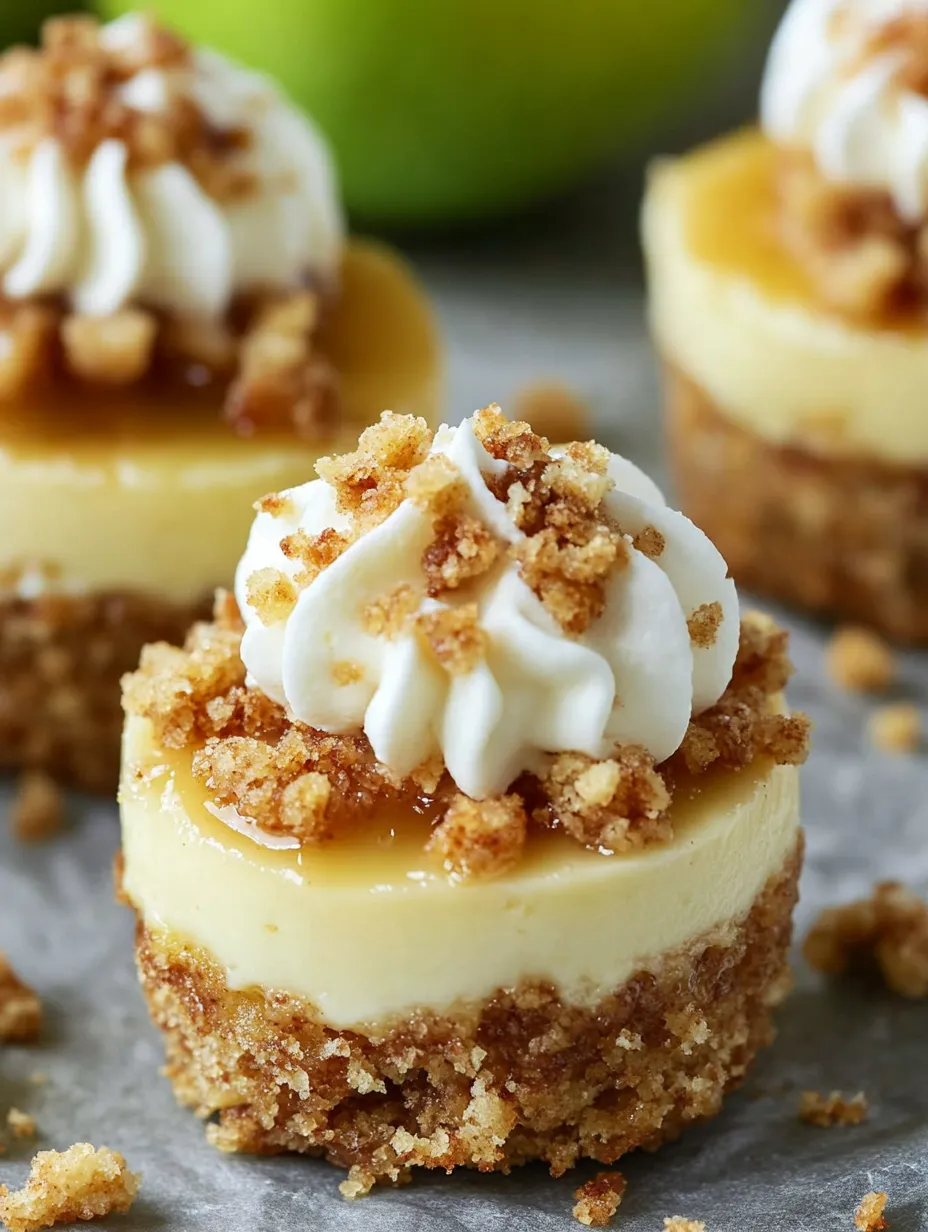
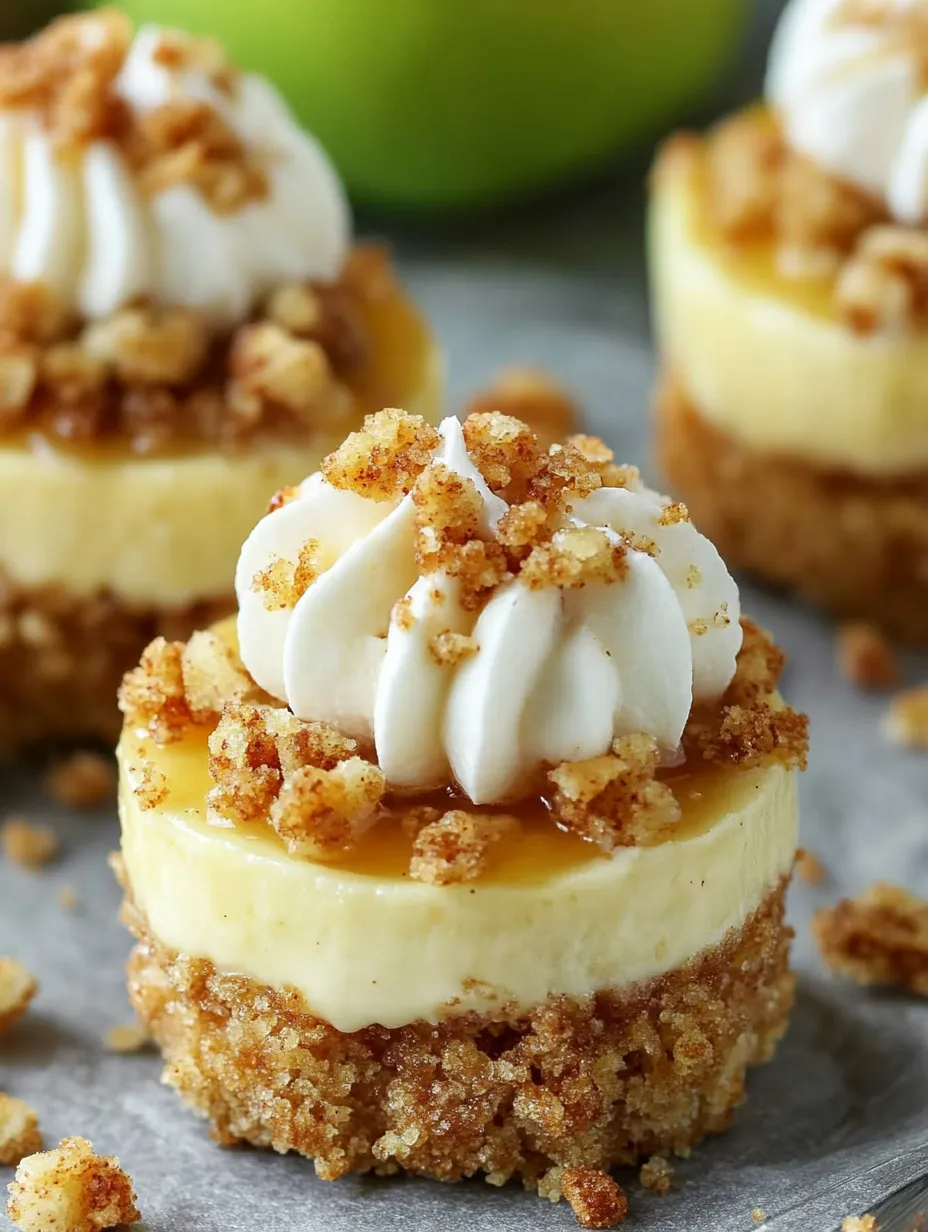
These mini apple crisp cheesecakes blend two favorite treats into one mouthwatering dessert. The crunchy graham base holds up a smooth cheesecake middle topped with spicy apple chunks and a crispy oat topping. They're just right for autumn get-togethers when you want to wow folks without baking a big cheesecake.
I came up with these for a fall gathering when I couldn't pick between apple crisp or cheesecake. Everyone loved them so much they've turned into my go-to sweet whenever trees start showing their autumn colors.
What You'll Need
- Graham cracker crumbs: They make a tasty foundation that works well with the soft cheesecake; buy them ready-made or smash your own in a blender
- Cream cheese: Creates the silky center layer; grab full-fat blocks and let them warm up for the creamiest results
- Fresh apples: Add juicy sweetness and bite; try Granny Smith or Honeycrisp for best results
- Cozy spices: Cinnamon and nutmeg bring that warm fall feeling to every bite of this treat
- Quick cooking oats: They form that amazing crunchy topping; standard oats can work too but quick ones crisp up better
- Caramel sauce: Gives that final touch of sweetness; make your own or grab a jar from the store
How To Make Them
- Get The Bottom Ready:
- Stir graham crumbs with sugar, cinnamon, and melted butter until it looks like damp sand. Push firmly into paper liners to make a solid bottom. A measuring spoon works great for this job. Cool these in the fridge while you work on the rest to help them set up.
- Whip Up The Topping:
- Mix the dry stuff first, then drizzle in melted butter and stir until you see chunky crumbs that stick when you squeeze them. Don't mix too much - you want little clumps not smooth mix. Chill it to firm up the butter which helps make those tasty crispy chunks.
- Fix The Apple Mix:
- Toss peeled and chopped apples with lemon juice to keep them bright, then mix with spices, brown sugar, and cornstarch. The cornstarch is key - it thickens the apple juices while baking so your cheesecake won't get soggy. Cut apples into tiny, same-sized bits so they cook evenly.
- Create The Cheesecake Part:
- Beat soft cream cheese until it's smooth before adding sugar, vanilla, and flour. The flour helps the filling stay stable and not crack. Add the egg last and just mix until it's blended in - too much mixing lets in air that can make cracks and weird bumps.
- Put It All Together:
- Scoop cheesecake mix over the cold crusts then add the apple stuff. Push the apples down a bit to flatten them, then sprinkle loads of crumb mix on top, covering everything. Getting these layers right means you'll taste all the good parts in each bite.
- Cook Them Up:
- Bake at a cool 325°F for around 30 minutes until the edges look set but the middle still wobbles slightly. The lower heat stops the cheesecake from puffing up and cracking. Watch for the topping to turn golden brown - that's how you know they're done.
 Save Pin
Good Things To Know
- You can freeze these little treats for up to 3 months - just thaw them in your fridge overnight
- No fancy springform pan to mess with, making these way easier than regular cheesecake
- Make them a day early to save time when you've got company coming
Adding cornstarch to the apples is my little trick for great texture. I picked it up from my grandma who always used it in her apple pies. It makes sure the filling gets thick and jammy instead of watery, which would ruin the cheesecake. Whenever I bake these, I remember her kitchen and that amazing smell of apples and cinnamon cooking.
How To Keep Them Fresh
These mini treats will stay good in a sealed container in your fridge for about 5 days. They actually taste better after sitting for a day as all the flavors mix together. If you want to keep them longer, wrap each cool cheesecake in plastic and put them in a freezer bag. When you're ready to eat them, let them thaw in the fridge overnight, then sit out for about 30 minutes so they're not too cold when you dig in.
Do-Ahead Steps
You can fix some parts early to save time on baking day. The graham cracker bottom and crumb topping can be made up to 3 days before and kept in the fridge. You can get the apple mix ready a day ahead though it might turn a bit brown; don't worry, it won't change how it tastes. Put everything together and bake them the day before your party, then let them chill overnight which makes them taste better and easier to handle.
 Save Pin
Ways To Serve Them
These cheesecakes taste great by themselves, but they turn extra special with a few simple extras. Pour warm caramel sauce over the top right before eating or set up a toppings bar with whipped cream, crushed toffee, or toasted pecans. For a fancy look, put each mini cheesecake on a small plate with a mint leaf and thin apple slice on the side. Serve them just a little cool but not cold from the fridge to get the best flavor.
Common Recipe Questions
- → Can I use a different type of crust?
Absolutely you can swap out the graham crackers for smashed digestive cookies, spicy gingersnaps, or even a thin ready-made pie crust from the store.
- → How do I store the mini cheesecakes?
Put your cooled treats in a sealed container and keep them in the fridge for up to 4 days. Wait to add the caramel until right before you eat them.
- → Can I freeze these mini cheesecakes?
They freeze really well. Just wrap each one separately and tuck them into a freezer container for up to 3 months. Let them thaw in your fridge overnight when you want to eat them.
- → What type of apples work best for this recipe?
Granny Smiths are awesome because they're tangy, but you might like Honeycrisps or Fujis if you want something sweeter.
- → Is it necessary to drizzle caramel sauce?
The caramel isn't a must-have, but it does make everything taste better and goes really well with the apple spice flavors.
- → Can I make this recipe gluten-free?
You can totally make these without gluten. Just grab some gluten-free graham crackers and oats for your crust and topping and you're all set.