
 Save Pin
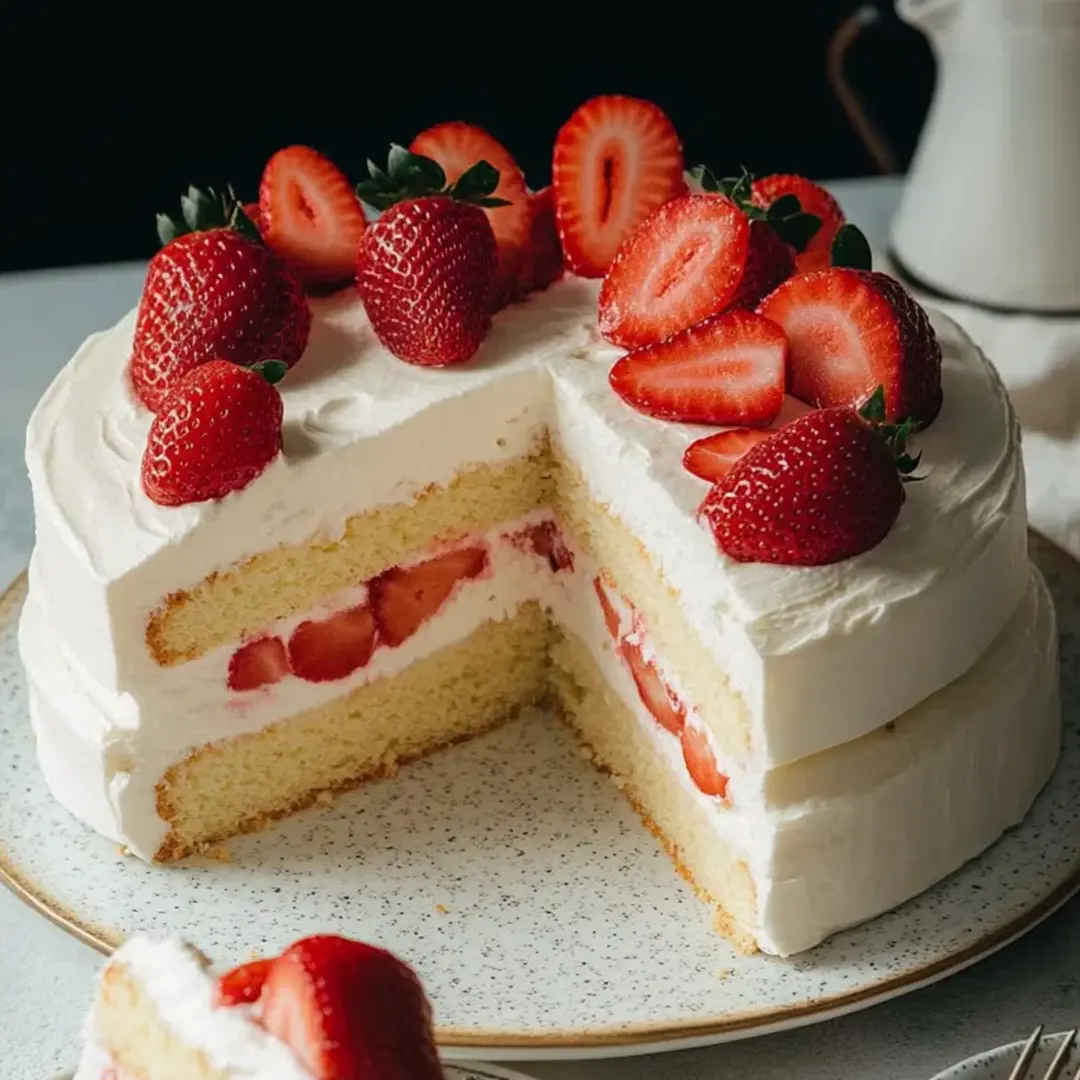
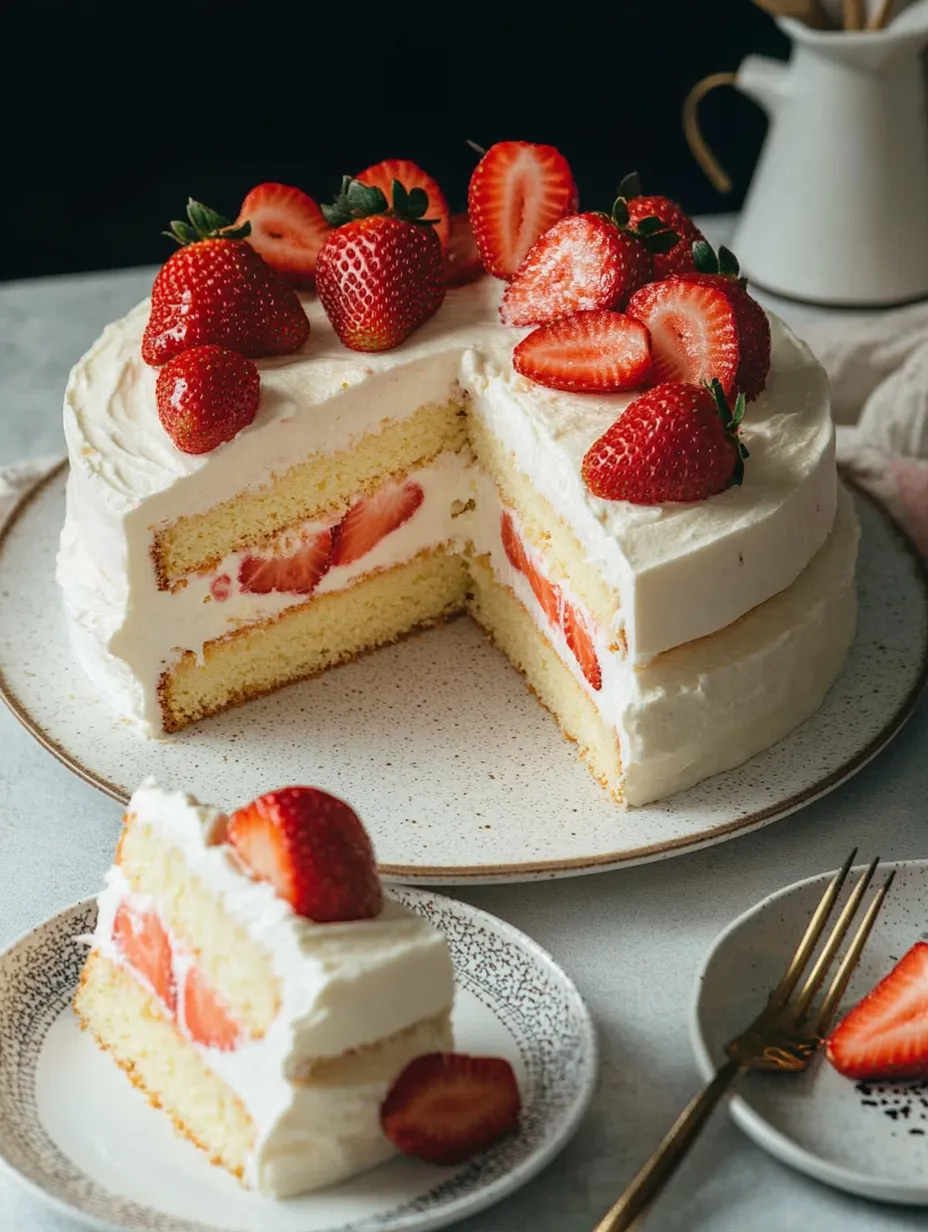
Nothing says party time like a soft-as-a-cloud Japanese strawberry cake. These fluffy layers, thick swirls of whipped cream, and fresh strawberries in every bite make it look as happy as it tastes. It’s a classic you’ll spot in Japanese bakeries, but you can totally whip it up at home. Great pick for birthdays, warm-weather gatherings, or just whenever you want something cheerful and sweet.
The first time I put this together for a pal’s birthday, everyone was all smiles after the first bite. Now it’s the dessert I bring to every special get-together. Kids can’t get enough and grownups never stop talking about it.
Luscious Ingredients
- Heavy whipping cream: this is what makes the frosting crazy light—grab one with thirty-six percent fat or more so it keeps its shape
- Confectioners sugar: makes your frosting sweeter and helps everything mix together smooth, just sift it first for mega fluffiness
- Strawberries: the real stars—use the sweetest, best-smelling berries you can find for max flavor
- Cake flour: sift it good to make your cake super tender and give it that classic delicate crumb
- Unsalted butter: brings richness while keeping things gentle—European-style if you can find it, but any will do
- Sugar: keeps the cake just sweet enough, and extra-fine or caster sugar will dissolve quick in the mix
- Egg yolks and egg whites: separate them—yolks for smoothness and flavor, whites for a high-rise airy sponge—bring them to room temp first
- Whole milk: gives the cake lots of moisture and tenderness, so stick with whole for best results
- Gelatin (optional): if you want your cream extra sturdy, melt a little in—it’s fine to leave it out for a pillowy finish
- For cake syrup (sugar and hot water): keeps your layers moist and adds just a bit of sweetness
Picking the Best Stuff
Go for strawberries that are shiny and deep red with no spots. Use eggs that are at room temp and always sift your flour. That’s how you get that extra-fluffy bite.
Simple Step Guide
- Add Your Finishing Touches:
- After stacking everything, spread a thin layer of cream over the cake, then pile it on for the sides and top. Spoon or pipe more cream wherever you want. Arrange those last strawberries on top, and if you stabilized your frosting, chill the whole thing for half an hour to set. If not, slice and eat right away.
- Layer and Build:
- Once everything’s cool, trim your cake so it’s flat, split it in two, then pop one half on your cake plate. Brush on your syrup, cover with cream, and spread on the berry slices. Stack the next layer, repeat, and slather on more cream and berries.
- Whip That Cream:
- For an extra sturdy swirl, let the gelatin soak and melt, stir in a bit of cream, then fold it all back in and whip until soft peaks form. No gelatin? Just beat your cream and powdered sugar till it’s fluffy and holds—don’t go overboard.
- Mix Up the Syrup:
- Stir hot water and sugar till clear. Pour in any strawberry juice you saved to make it even tastier.
- Get Strawberries Ready:
- Cut them up and toss them with sugar. Let them hang out for up to two hours, getting juicy. Keep the juice for later—it’ll come in handy for the cake.
- Cool Things Down and Take Out the Cake:
- The cake will pull away a bit from the pan when it’s done. Run a knife around it to loosen, then flip it upside down on a rack to chill and avoid sinking.
- Bake Till Perfect:
- Set your cake pan in the water bath, pour in hot water up to about an inch, and bake about ninety minutes. Don’t open the oven partway, or the cake might fall.
- Pour and Prep:
- Move your batter into the lined pan and tap it twice on the counter to shake out bubbles. That gives you a tight, even crumb.
- Bring in the Whites:
- Add a scoop of your beaten egg whites to the yolk-flour mix first to loosen it up. Gently fold this back with the rest—don’t over-stir or you’ll lose all that air.
- Whip the Whites:
- In a squeaky clean bowl, beat whites until foamy, sprinkle in sugar little by little, and whip until they look shiny and hold medium peaks—nice and stable but still soft.
- Add Yolks and Flour:
- Sift in the flour so it stays clump-free, then gently mix until you get a smooth batter. Stir in the yolks till everything’s got an even color and feel.
- Melt Butter and Milk Together:
- Microwave butter and milk in a heat-safe bowl until just melted. Stir well so you’ve got a smooth, blended liquid.
- Set Up the Water Bath:
- Grab a deep baking pan, add boiling water so it goes an inch up the sides of your cake pan. This way the heat stays gentle, the cake comes out extra soft and won’t brown too much or get cracks.
- Start the Cake Prep:
- Before anything else, line your cake pan with parchment paper and preheat your oven to three twenty-five Fahrenheit. This keeps things neat and makes the cake slide right out.
Save Pin
Nothing beats using super ripe strawberries—their smell fills the kitchen and takes me right back to berry picking with my grandma every summer. It’s the fresh fruit that really makes the whole thing shine compared to anything store-bought.
Keeping it Fresh
Keep your cake in the fridge, just loosely covered so it won’t soak up fridge smells. Eat it within a day to get the best taste. You can freeze plain cake layers, then thaw them and add filling when you’re ready.
Switch-Ups
No cake flour? Use regular flour with a spoonful of cornstarch mixed in for each cup. Skim milk'll do in a pinch, though the cake won’t be as tender. If you want vegan layers, swap in coconut cream and skip the gelatin.
How to Serve
Extra strawberries and a splash of that sweet berry juice on the side? Yes, please. Add a sprig of mint if you’ve got it. It’s awesome with green tea or some bubbly to bring out that Japanese dessert shop feeling.
 Save Pin
Background and Traditions
In Japan, this shortcake is what most folks choose for birthdays or holidays. It’s inspired by European sponges but is made just for Japanese tastes—think lots of whipped cream, not much sweetness, and plenty of strawberries. It’s all about feeling happy and welcoming spring.
Common Recipe Questions
- → Why does the cake turn out so soft and fluffy?
Folding in whipped egg whites gently gives you lots of lift, and putting it in a steamy water bath keeps the cake super moist and pillowy.
- → Do I have to pick stabilized whipped cream or is basic whipped cream good too?
Basic cream works great if you’re finishing it quickly, but if you want to keep it standing longer, a little gelatin will make it last.
- → What’s a trick to stop the cake from shrinking or falling in the middle?
Don’t overmix, and try not to open the door too early. Use a knife to loosen around the edge while it's hot so the sides come out nice and clean.
- → Should I add sugar to my strawberries ahead of time?
Tossing berries with sugar pulls out their juice and boosts sweetness, but if you're into something a little tart, just slice and add them fresh.
- → Got any advice for slicing so it stays tidy?
Pop the cake in the fridge before cutting it and grab a bread knife—it’ll help you make neat, clean slices.
- → Can I prep this in advance?
You can bake the sponge a day early, but stack it up with the cream and strawberries just before eating for the best taste and texture.