
 Save Pin
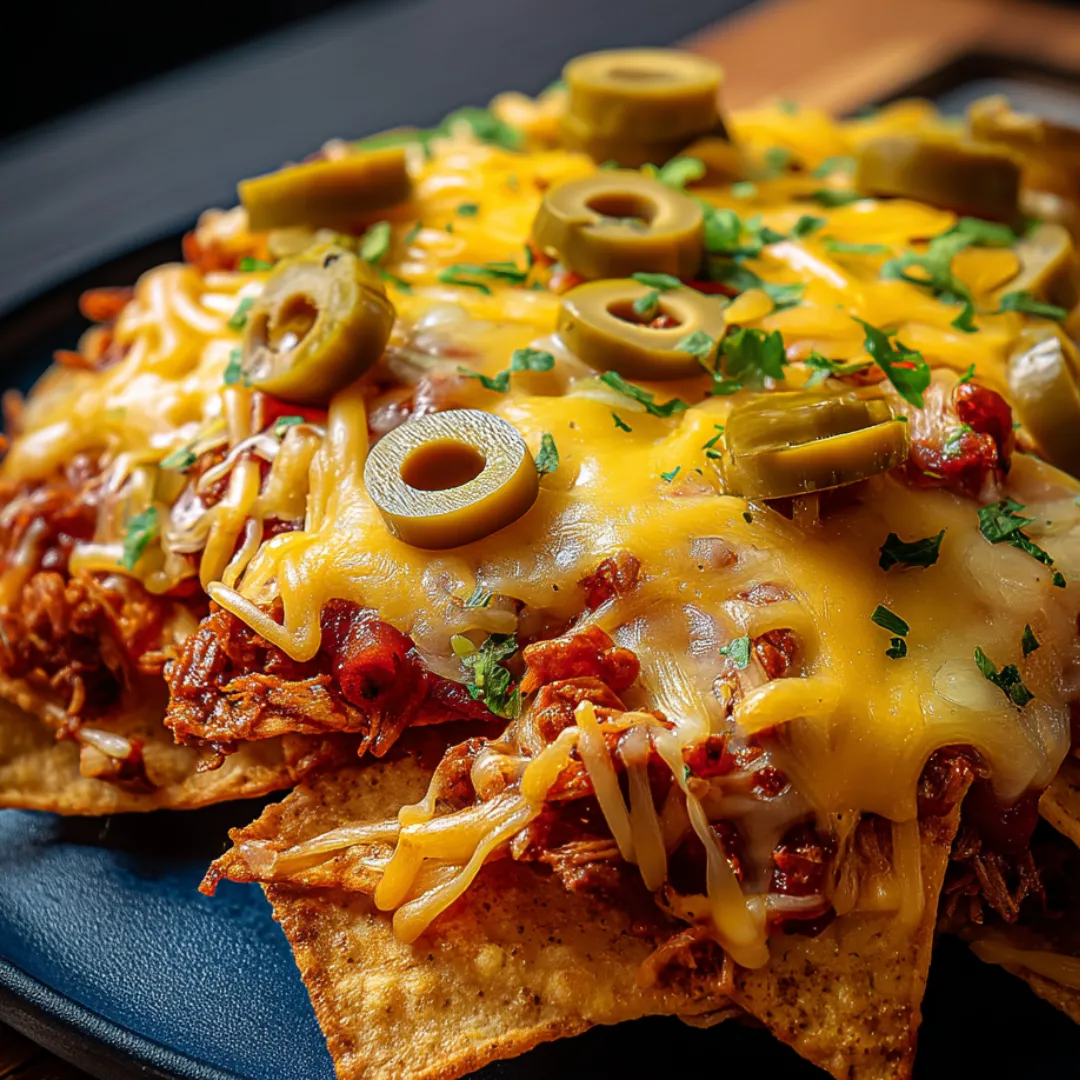
Imagine a heap of crunchy tortilla chips smothered in stretchy, melted cheese that pulls into perfect strands with each grab. These stacked nachos hit all the right notes – the snap of chips, the gooey cheese blanket, and bursts of color and flavor from fresh toppings. This isn't just a snack; it's a party on a plate. Great for laid-back get-togethers or when you're craving something comforting, these nachos turn basic items into an addictive dish that pulls folks together around food.
I took these nachos to my sister's new home party last month, and they vanished quicker than anything else people brought. My brother-in-law, who thinks he's a nacho expert after countless sports bar visits, told me they were his all-time favorites. I think what makes them work is taking time to build them right – no sad, bare chips hiding underneath everything.
Key Ingredients
- Tortilla chips: Go for thick, hardy triangles that won't crack under the weight of your toppings; restaurant-type chips with a bit of salt work great and stay crisp longer. You'll need 12-16 ounces.
- Cheese mix: Combining different cheeses makes the magic happen; sharp cheddar brings the flavor while monterey jack or mozzarella gives you that awesome stretch when you pull chips apart. Use 3 cups total (2 cups cheddar, 1 cup monterey jack or mozzarella).
- Ground beef: Load it up with cumin, chili powder, and garlic for true Mexican-inspired taste; your meat should be moist but not swimming in grease that would turn chips soggy. You'll need 1 pound.
- Raw toppings: Crunchy red onion, juicy tomatoes, and fresh cilantro add brightness that balances the rich cheese and meat. Grab ½ cup diced red onion, 1 cup diced tomatoes, ¼ cup chopped cilantro.
- Extra add-ons: Cool sour cream, chunky guacamole, and bright salsa served on the side (not baked) give temperature contrast and let everyone dress up their own portion. About ½ cup each of sour cream, guacamole, and salsa.
 Save Pin
Cooking Guide
- Step 1:
- Get things ready – Turn your oven to 400°F (200°C) and put parchment paper on a big, rimmed baking sheet so cleanup won't be a hassle. This hot temp makes cheese melt fast without giving chips time to get soft. The rimmed edges stop cheese from dripping off and making a mess in your oven.
- Step 2:
- Make your meat taste amazing – Put a large skillet on medium-high heat and cook 1 pound of ground beef, breaking it into tiny, even bits with a wooden spoon. When there's no pink left, drain most fat but keep a little for taste. Put it back on the heat and mix in 1 tablespoon chili powder, 1 teaspoon cumin, 1 teaspoon garlic powder, ½ teaspoon salt, and ¼ teaspoon black pepper. Add ¼ cup water, stirring to make a light coating that covers the meat. Let it bubble for 2-3 minutes until most liquid goes away but meat stays juicy.
- Step 3:
- Build your base – Spread half of a 12-16 ounce bag of tortilla chips in a single layer on your paper-lined sheet, making them overlap a bit. Scatter one-third of your 3 cups cheese mix (2 cups cheddar, 1 cup monterey jack or mozzarella), then half the cooked meat, and half your chopped veggies (¼ cup diced red onion, ½ cup diced tomatoes, ¼ cup sliced black olives). Now add another chip layer, another third of cheese, the rest of your meat, and most remaining veggies, saving a few for the final touch.
- Step 4:
- Top it off with cheese – Sprinkle all remaining cheese across the top, trying to cover as many chips as possible. This last cheese layer works like glue that holds your nachos together and keeps toppings from falling when served. Don't forget about the chips around the edges – they can dry out fast while baking.
- Step 5:
- Watch while baking – Put your loaded nachos in the hot oven and bake for 7-10 minutes, keeping an eye on them. They're done when cheese has totally melted and just starts to bubble, with a few spots turning golden. Don't cook too long or chips will burn quickly. If cheese isn't melting evenly, turn the pan around halfway through.
- Step 6:
- Add the fresh stuff – Take nachos out of the oven and right away add your saved toppings – ½ cup diced tomatoes, ¼ cup chopped cilantro, and ¼ cup jalapeño slices if you want them. This mix of hot melted stuff with cool fresh toppings makes everything taste better. For a nice look, put small bowls with ½ cup sour cream, ½ cup guacamole, and ½ cup salsa around your nacho plate so people can dip easily.
- Step 7:
- Don't wait to eat – Loaded nachos are best right away while the cheese is hot and stretchy! For casual hangouts, just put the whole baking sheet (on something heat-safe) in the middle of the table and let everyone grab what they want. For fancier times, use a wide spatula to move portions to plates, making sure each serving has enough chips, cheese, and toppings.
- Step 8:
- Let people add extras – Put more toppings in small bowls around the nachos – extra jalapeños for spice lovers, ¼ cup chopped green onions for freshness, and different hot sauces for folks who want to control their own heat level. This hands-on part makes eating nachos even more fun for your guests.
I fell in love with loaded nachos in college when my roommate from San Antonio showed me her family's game day recipe. Their trick was careful layering and using several cheese types instead of just cheddar. Years later, during a tough breakup, I made myself a huge batch that somehow made me feel better. Now I bring these nachos to every casual gathering – and never take any home afterward.
Layering Like A Pro
The sign of truly awesome nachos is making sure every single chip gets plenty of toppings. Instead of that letdown when you reach the bottom half and find bare chips, good layering gives you a consistent nacho experience from start to finish.
For big parties, try making a "nacho table" by covering your entire table with foil, then building massive nacho layers across the whole surface. This way of eating creates instant memories as everyone stands around sharing the giant snack together.
Fresh Topping Ideas
While standard nacho toppings always work great, don't be scared to try unexpected flavors that can take your nachos up a notch. Try drizzling 1 tablespoon honey over your finished batch for a sweet-meets-spicy combo that's weirdly addictive. The touch of sweetness works amazingly against spicy jalapeños and salty chips.
For something different, try Korean-style nachos with bulgogi beef, ½ cup kimchi, and sour cream mixed with gochujang. The tangy kimchi tastes surprisingly good with melted cheese. Or go Mediterranean with ground lamb, ½ cup feta cheese, ¼ cup olives, and a cucumber-yogurt sauce for a totally different spin.
 Save Pin
Amazing Cheese Stretches
The best part of any great nacho experience is that first perfect cheese pull – when you lift a chip and cheese stretches into those tempting strings. To get this social-media-worthy effect, add some whole-milk mozzarella to your cheese mix. It has lots of moisture and protein that create those picture-perfect stretchy strands.
For even more dramatic cheese pulls, let your nachos sit for exactly one minute after coming out of the oven before serving. This quick rest lets the cheese set just enough to create maximum stretch without getting too firm.
I've made these loaded nachos for everything from football games to movie nights to last-minute dinner parties when I had nothing else planned. There's something special about how a simple plate of nachos can turn any get-together into something fun. What I love most is how they bring people closer – everyone reaching in, making their ideal bite, and enjoying food together. In today's formal world, there's something wonderfully basic and connecting about gathering around nachos, using your hands, and enjoying each other's company over stretchy cheese and crunchy chips. When things get too complicated, sometimes all you need is the simple joy of really good loaded nachos.
Common Recipe Questions
- → How can I stop my nachos from turning soft?
- Go for thicker, sturdier chips and don't put wet stuff on before cooking. Save juicy items like tomatoes and guacamole for after baking, or just serve them separately.
- → Are these nachos good for vegetarians?
- For sure! Drop the meat and throw in black beans, pintos, or refried beans for protein. You can also load up with extra veggies like corn, colorful peppers, or avocado chunks.
- → What cheese works best on nachos?
- Mix it up for the best results - something sharp like cheddar for taste and something that melts smoothly like mozzarella or Monterey Jack. Want a real Mexican touch? Try some Oaxaca or queso asadero.
- → Can I make these nachos before my guests arrive?
- You can chop and ready all your stuff ahead, but don't put it together or bake until it's time to eat. Nachos taste way better fresh out of the oven when the cheese is still gooey.
- → What's the trick to layering nachos properly?
- Put down a thin spread of chips first, sprinkle some cheese, add your toppings, then finish with more cheese on top. This way you'll get cheese in every bite and your toppings won't slide off the chips.