
 Save Pin
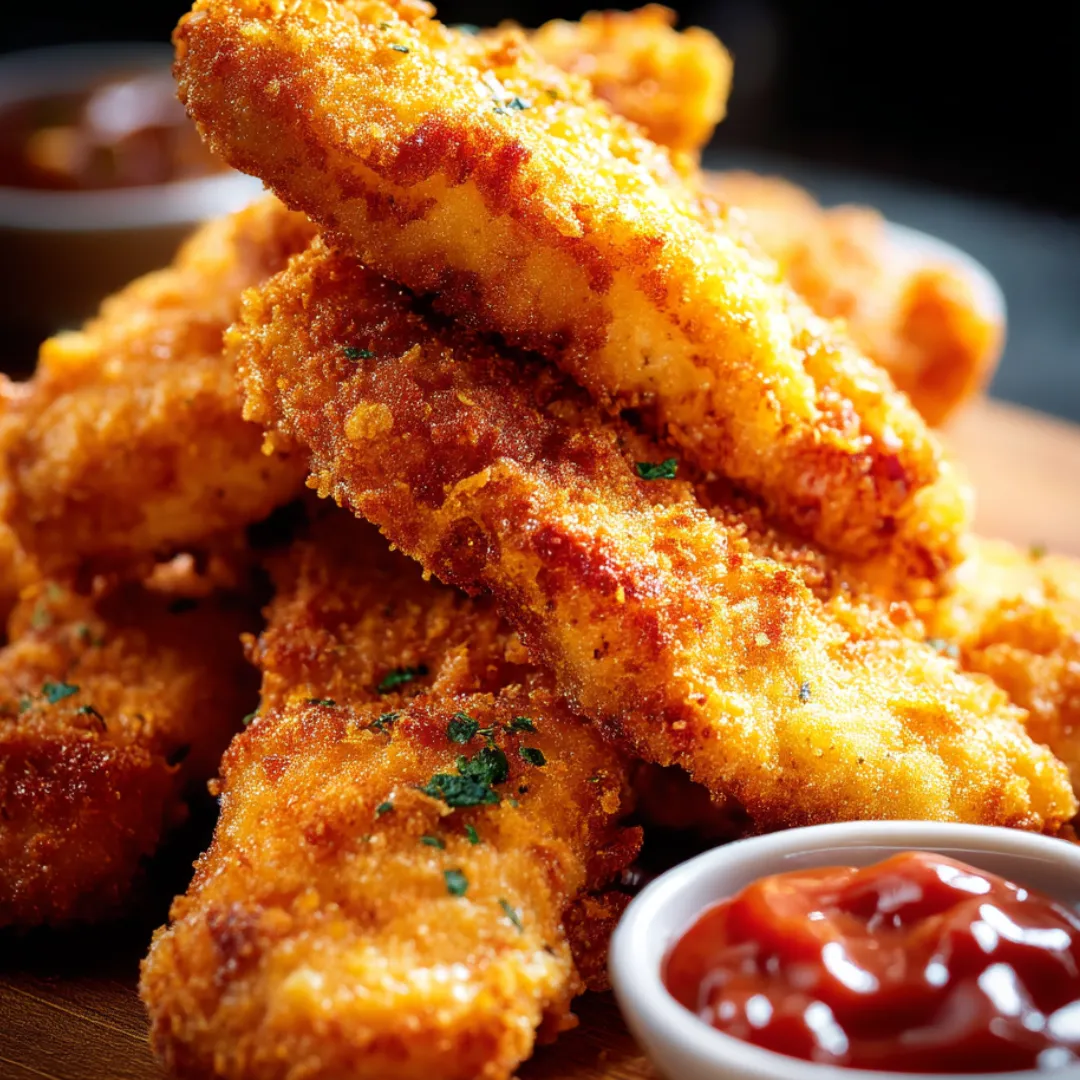
Crispy-coated chicken tenders that break open to reveal juicy, tender meat inside. Each bite gives you that perfect balance of crunchy outside and soft, moist chicken that both kids and grown-ups can't resist. These homemade strips beat frozen ones by miles—you'll taste the difference from custom seasonings while knowing exactly what's in your food. The special triple-coating method gives you that restaurant-style crunch that's hard to get at home, and proper cooking keeps the chicken juicy instead of dry. They work for everything from quick family dinners to game day snacks or party finger foods, giving you maximum taste without hours of work.
I learned the secrets of amazing chicken tenders while working at a busy sports bar in college. The triple-coating method changed how I cook at home forever. The first time I made these for my family, my picky nephew who normally only ate dinosaur-shaped nuggets wolfed down three pieces in minutes, and my food-snob brother-in-law wanted my recipe right away. Years later at a football party where half my guests were professional cooks, these basic tenders vanished faster than the fancy appetizers I'd spent hours making. Now they're what everyone asks me to bring to potlucks and what I cook when I need something both kids and adults will enjoy. There's something really rewarding about turning simple chicken into food that makes even the pickiest people ask for more.
Tasty Ingredients Required
- Chicken Breasts or Tenderloins: Your chicken should be high quality—look for plump, pink pieces without brown spots or slime. If you're using whole breasts, cut them against the grain into 1-inch strips to make them more tender. True tenderloins (the small muscle attached to the breast) will be extra tender but cost more. Either works great, though tenderloins cook a bit faster since they're smaller. Fresh chicken makes the juiciest tenders, but properly thawed frozen chicken is fine too. Try to pick pieces that are similar in thickness or gently flatten thicker parts for even cooking. The chicken's natural moisture helps the first flour layer stick, starting your breading process right.
- Panko Breadcrumbs: These Japanese breadcrumbs create that light, airy crunch that makes homemade tenders special. Unlike regular breadcrumbs, panko has a flaky texture that soaks up less oil and stays crispier longer. Look for bright white crumbs with large, irregular pieces rather than fine powder. Their bigger surface area creates more crunch and better texture. If you can't find panko, regular breadcrumbs will work but won't be quite as crispy. For best results, don't crush the panko when mixing in seasonings—those uneven edges make the extra-crunchy outside everyone loves about good chicken tenders.
- All-Purpose Flour: This makes the critical first layer that helps everything else stick to the chicken. The flour coating also locks in moisture during cooking so your chicken doesn't dry out. Season the flour (not just the breadcrumbs) to get flavor in every layer. Apply flour as a thin, even coating covering all the chicken without clumps. Too much creates a gummy layer, while too little means patchy breading that might fall off while cooking. This first step might seem small, but it's the foundation everything else builds on. If you're avoiding gluten, a one-to-one gluten-free flour mix works just as well.
- Eggs and Milk: These create the sticky middle layer between flour and breadcrumbs. The protein in eggs firms up during cooking, making a strong glue that keeps breading stuck to the chicken. Adding a little milk makes the mixture flow better for more even coating. Beat the eggs completely until you don't see any separate whites or yolks. This egg wash adds moisture that activates starches in the flour, creating a sticky surface for breadcrumbs to grab onto. The fat in both eggs and milk also adds richness to your final flavor. If you need a dairy-free option, plain unsweetened plant milk works fine without changing the results much.
- Seasoning Blend: This turns plain chicken into something truly tasty. Garlic powder, onion powder, and paprika create a balanced savory flavor that complements chicken without taking over. These dried seasonings mix easily into dry ingredients and won't burn like fresh ones might. Dried herbs like oregano add complexity and make the coating look more interesting. A small amount of seasoning gets concentrated on the outside of each tender, creating big flavor in every bite. Salt is especially important—it seasons the coating and pulls a bit of moisture to the chicken's surface, helping breading stick better. Feel free to customize—add cayenne for heat, Italian seasoning for herby flavor, or lemon pepper for brightness.
- Parmesan Cheese: This optional addition brings a savory depth that lifts the whole flavor profile. The cheese adds saltiness and umami while helping the coating brown better because of its protein content. Use finely grated Parmesan rather than shredded for even distribution throughout your breadcrumb mix. The cheese partly melts during cooking, creating pockets of intense flavor in the breading. Besides taste, Parmesan proteins help the coating brown more evenly, improving both looks and flavor through better browning. For best quality, use real Parmigiano-Reggiano or Grana Padano instead of pre-grated stuff with anti-caking chemicals that affect texture and melting.
- Cooking Oil: The right oil gives you crispy tenders without greasiness. For pan-frying, pick an oil with high smoke point like vegetable, canola, or peanut oil. The oil transfers heat to transform wet breading into crispy coating. If you're baking, a light spray or drizzle of oil helps browning and creates results more like fried tenders. How much oil you use really affects your final texture—too little leaves pale, soft coating while too much makes greasy, heavy tenders. The right oil temperature (around 350°F/175°C) matters too—too hot burns the outside before the chicken cooks, too cool means oil-soaked tenders instead of crispy ones.
 Save Pin
Easy Cooking Method
- Step 1:
- Get your chicken ready – Start by drying 4 boneless, skinless chicken breasts with paper towels to get rid of extra moisture that would stop proper browning. If using whole breasts, put them on a cutting board and carefully cut against the grain (across the visible muscle lines) into 1-inch wide strips. Cutting this way shortens muscle fibers for more tender chicken. Try to keep all pieces about the same thickness for even cooking. If some pieces are much thicker than others, put them between plastic wrap and lightly pound with a meat mallet or heavy pan until they're all about ½-inch thick. Season chicken strips all over with ½ teaspoon salt and ¼ teaspoon black pepper, gently pressing seasonings into the meat. This first seasoning step is crucial because it flavors the chicken itself, not just the coating. Let seasoned chicken rest at room temperature for 10-15 minutes to warm up slightly for more even cooking.
- Step 2:
- Make your breading station – While chicken rests, set up your three-part breading area using shallow dishes or pie plates with enough room to easily turn and coat chicken pieces. In the first dish, mix 1 cup all-purpose flour with 1 teaspoon garlic powder, 1 teaspoon onion powder, 1 teaspoon paprika, ½ teaspoon salt, and ¼ teaspoon black pepper, whisking well to mix seasonings evenly. In the second dish, beat 2 large eggs and 2 tablespoons milk until completely smooth with no streaks. In the third dish, mix 1½ cups panko breadcrumbs with ½ cup finely grated Parmesan cheese (if using), ½ teaspoon garlic powder, ½ teaspoon dried oregano, and ¼ teaspoon black pepper, mixing with your fingers without crushing the panko. Arrange dishes in order: seasoned flour first, then egg mixture, then breadcrumb mixture. Put a clean plate or baking sheet at the end for your breaded chicken. This organization makes the process smoother and less messy.
- Step 3:
- Use the triple-coating method – Work with one piece of chicken at a time to avoid clumping. First, put a chicken strip in the seasoned flour, turning to coat completely and pressing gently so flour sticks to all surfaces. Lift and lightly shake off extra flour—too much creates a pasty layer. Next, dip the floured chicken into the egg mixture, turning to coat evenly and letting excess drip back into the bowl. Finally, place chicken in the breadcrumb mixture, firmly pressing crumbs onto all sides to create a good coating. Pressing helps breadcrumbs stick better than just tossing chicken in the mixture. Move the fully breaded piece to the clean plate and repeat with remaining chicken strips, being careful not to crowd pieces on the plate, which could make the breading soggy. If needed, use multiple plates in a single layer. This careful triple-coating approach builds the foundation for perfectly crispy tenders.
- Step 4:
- Let breading set before cooking – After all chicken pieces are breaded, let them rest for 5-10 minutes before cooking. This short rest helps the coating stick more firmly to the chicken, so it won't fall off during cooking. During this time, you'll notice the coating changing from wet-looking to more dry as moisture from the egg gets absorbed by both the flour underneath and breadcrumbs on top. This often-skipped step makes the difference between breading that falls off in the pan and breading that forms a solid shell around your chicken. While the coating sets, prep your cooking method. If pan-frying, add enough oil to a large skillet to reach about ¼-inch deep and heat over medium-high until it hits 350°F (175°C). If you don't have a thermometer, test by dropping in a few breadcrumbs—they should sizzle right away but not burn.
- Step 5:
- Cook with care – For pan-frying, carefully add breaded chicken tenders to hot oil, working in batches to avoid overcrowding. Too many pieces at once makes the oil temperature drop too much, giving you greasy, soggy tenders instead of crispy ones. Cook for 3-4 minutes on the first side until golden brown, then gently flip with tongs (not a fork, which would poke holes in the coating) and cook another 3-4 minutes. For baking, preheat your oven to 400°F (200°C) and put breaded tenders on a wire rack over a baking sheet. The raised position lets air flow around the entire tender for even crisping. Lightly spray or drizzle tenders with oil to help browning, then bake for 15-18 minutes, flipping halfway through. Either way, chicken is done when it reaches 165°F (74°C) inside and juices run clear when you pierce the thickest part. Properly cooked tenders should be golden-brown outside with no raw flour showing.
- Step 6:
- Keep your cooking consistent – If cooking in batches, let oil return to 350°F (175°C) before adding more chicken. Remove any large crumbs from the oil between batches, as they can burn and make later pieces taste bitter. As tenders finish cooking, put them on a wire rack over a sheet pan instead of on paper towels. The rack lets air flow around the entire tender, keeping the bottom from getting soggy from trapped steam. If you need to keep tenders warm while finishing more batches, put the rack of finished tenders in a 200°F (95°C) oven. This low temperature keeps them warm without cooking the chicken more, which would dry it out. For the crispiest results, serve tenders as soon as possible after cooking, when the contrast between crunchy outside and juicy inside is strongest.
- Step 7:
- Make tasty dipping sauces – While tenders taste great alone, offering various dips makes the meal more fun and lets everyone customize. For honey mustard, mix ¼ cup mayo, 2 tablespoons Dijon mustard, 2 tablespoons honey, 1 teaspoon lemon juice, and a pinch of salt until smooth. For simple BBQ sauce, mix ½ cup ketchup, 2 tablespoons brown sugar, 1 tablespoon Worcestershire sauce, 1 teaspoon smoked paprika, and ½ teaspoon garlic powder. For Buffalo sauce, melt 4 tablespoons butter and mix in ⅓ cup hot sauce, 1 teaspoon vinegar, and a pinch of garlic powder. For homemade ranch, mix ½ cup sour cream with ¼ cup buttermilk, 1 tablespoon each of fresh chopped parsley, dill, and chives, ½ teaspoon garlic powder, ½ teaspoon onion powder, plus salt and pepper to taste. You can make sauces up to a day ahead and keep them in the fridge in small serving bowls. Let them sit at room temperature about 20 minutes before serving for best flavor.
- Step 8:
- Serve them properly – Arrange chicken tenders on a platter lined with parchment paper or a clean kitchen towel to absorb any extra oil without making the coating soggy. For casual meals, serve tenders in a paper-lined basket with small cups of various dips. For fancier presentation, stack tenders in a criss-cross pattern on a platter with small bowls of sauce around the base, adding fresh herbs or lemon wedges for color. If serving as a main dish, pair with sides like crispy oven fries, coleslaw, or a simple green salad to balance the richness. For parties, keep tenders warm in a 170°F (77°C) oven for up to 30 minutes, though they're best eaten fresh when the contrast between crispy outside and juicy inside is strongest. Offer plenty of napkins—truly great chicken tenders are worth getting messy fingers for.
I found out how important drying chicken is before breading after a dinner party fail early in my cooking days. I rushed and skipped proper drying, ending up with pale, soggy tenders that lost their coating with every bite. Now I always lay chicken pieces on paper towels and press more towels on top to make sure they're truly dry before starting. My sister-in-law, who usually stays away from fried food, makes an exception for these tenders because they "don't have that heavy, greasy feeling" she hates about similar dishes. My young nephew tried them once and told me very seriously that "these are WAY better than McDonald's"—which from a six-year-old is basically the highest compliment possible. I've noticed that no matter what else I put on the table with these tenders, they're always the first thing to disappear.
Great Side Dish Ideas
These chicken tenders work in lots of different meal situations if you pair them with the right sides. For a simple family dinner, serve them with crispy oven fries seasoned with the same spices you used on the chicken for matching flavors. Add some steamed broccoli or green beans for health benefits without competing tastes.
When hosting friends, set up a build-your-own tender bar with different dipping sauces, small buns, lettuce, and tomato slices so people can eat tenders plain or make mini sandwiches. This hands-on approach makes basic tenders feel special and gets everyone talking.
When feeding both kids and adults, think about giving grown-ups fancier sides with their tenders—maybe a quinoa salad with dried cranberries and feta, or roasted Brussels sprouts with balsamic glaze—while keeping the main chicken part the same for everyone. This makes the meal feel more adult while still being kid-friendly.
For picnics or game watching, make tenders ahead and serve them at room temp alongside pasta salad, coleslaw, and fresh fruit. The tenders keep their nice texture even when cool, which makes them perfect for casual gatherings.
Fun Flavor Twists
Once you know the basic method, try these variations to expand your chicken tender options. For Southern flair, add 1 teaspoon cayenne pepper to your flour mix and 1 tablespoon honey to your egg wash. The gentle heat and sweetness create more complex flavors similar to Nashville hot chicken.
Make an Italian version by adding 2 tablespoons Italian seasoning and an extra ¼ cup Parmesan to your breadcrumb mixture. Serve with marinara for dipping and some garlic bread for a meal that tastes like chicken parmesan.
For Asian-inspired tenders, add 1 teaspoon ground ginger and 1 teaspoon five-spice powder to your flour mixture. Serve with a dip made from equal parts honey and soy sauce plus a dash of sesame oil, then top with sliced green onions and sesame seeds.
Try a Mediterranean twist by adding 1 tablespoon finely chopped fresh rosemary and the zest from one lemon to your breadcrumb mix. Serve with tzatziki sauce for dipping and a Greek salad on the side for a fresh, herby meal.
 Save Pin
Time-Saving Prep Options
These chicken tenders offer several ways to prep ahead and save time. You can prepare all the breading station ingredients up to a day before and keep them covered in the fridge. Just cover the seasoned flour and breadcrumb mixtures with plastic wrap, and store the egg mixture in a sealed container.
For partly prepped tenders, complete the whole breading process, then arrange the breaded chicken in a single layer on a parchment-lined baking sheet. Cover loosely with plastic wrap and refrigerate for up to 4 hours before cooking. This advance work makes them great for dinner parties or family gatherings when you want to minimize last-minute cooking.
Fully cooked tenders can be frozen for up to 3 months. Let them cool completely, then freeze them in a single layer on a baking sheet before moving to an airtight container or freezer bag. Reheat from frozen in a 375°F (190°C) oven for 15-20 minutes until hot and crispy.
These homemade chicken tenders have become my go-to dish when cooking for people I don't know well or when I need a guaranteed hit with minimal stress. There's something really satisfying about mastering a food that works for all ages and tastes, turning simple chicken breast into something everyone gets excited about. I've realized that the most valuable recipes aren't always the fanciest or most exotic, but the ones that reliably bring people to the table with genuine smiles. Whether you're feeding picky kids, entertaining guests with sophisticated tastes, or just treating yourself to comfort food after a long day, these crispy, juicy tenders deliver satisfaction way beyond their simple preparation.
Common Recipe Questions
- → Can I prep these chicken strips beforehand?
- Sure thing! You can coat the chicken up to 24 hours early and keep it in the fridge until cooking time. For already cooked strips, warm them up in a 350°F oven for 10 minutes to bring back the crunch.
- → How do I stop the coating from coming off?
- Dry the chicken pieces with paper towels first, push the breadcrumbs firmly onto the meat, and let your coated strips sit for 5-10 minutes before cooking so the layers stick together better.
- → Can I store these chicken strips in the freezer?
- You bet! Freeze the cooked and cooled strips flat on a tray, then pack them in a freezer bag. When ready to eat, heat them straight from frozen in a 375°F oven for 15-20 minutes until they're hot inside.
- → What's the way to make these without gluten?
- Swap regular flour for gluten-free flour and grab gluten-free panko or breadcrumbs. Don't forget to check your spice mixes too - some might contain hidden gluten.
- → What oil works best for frying these strips?
- Canola oil, vegetable oil, or peanut oil are your best bets for frying since they don't burn easily. When pan-frying, pour about 1/4 inch of oil into your skillet.